Configure & Run Self-Hosted Azure DevOps Agent Behind Proxy
With the growing security leaks and threats around the global, we are spending more and more time in securing our VMs and blocking unnecessary traffic to and fro from our VM, be it be in cloud or on on-premises.
It is a very common case in enterprises that the IT team locks down the entire infrastructure and gives you a corporate proxy address that you can use and configure in your apps, incase you need to access the whitelisted urls over the internet.
In this post, we are going to discuss how to configure Azure DevOps agent behind a corporate proxy.
Before we proceed to configure the AzureDevOps agent behind the proxy, lets get our prerequisites straight.
- Corporate Proxy Address (eg: http://180.40.62.22:8000)
- AzureDevOps Server/Organisation URL
- AzureDevOps Personal Access Token (PAT)
- Agent Pool Name (Optional)
Now, lets get on to configure our AzureDevOps agent.

Step 1: Grab the AzureDevOps server/organisation URL

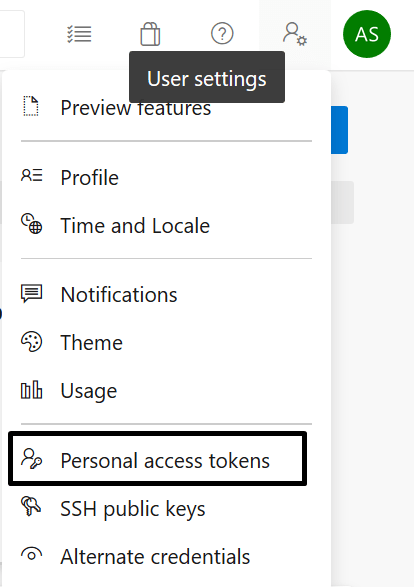
Step 2: Create the PAT Token from User Settings in Azure DevOps portal

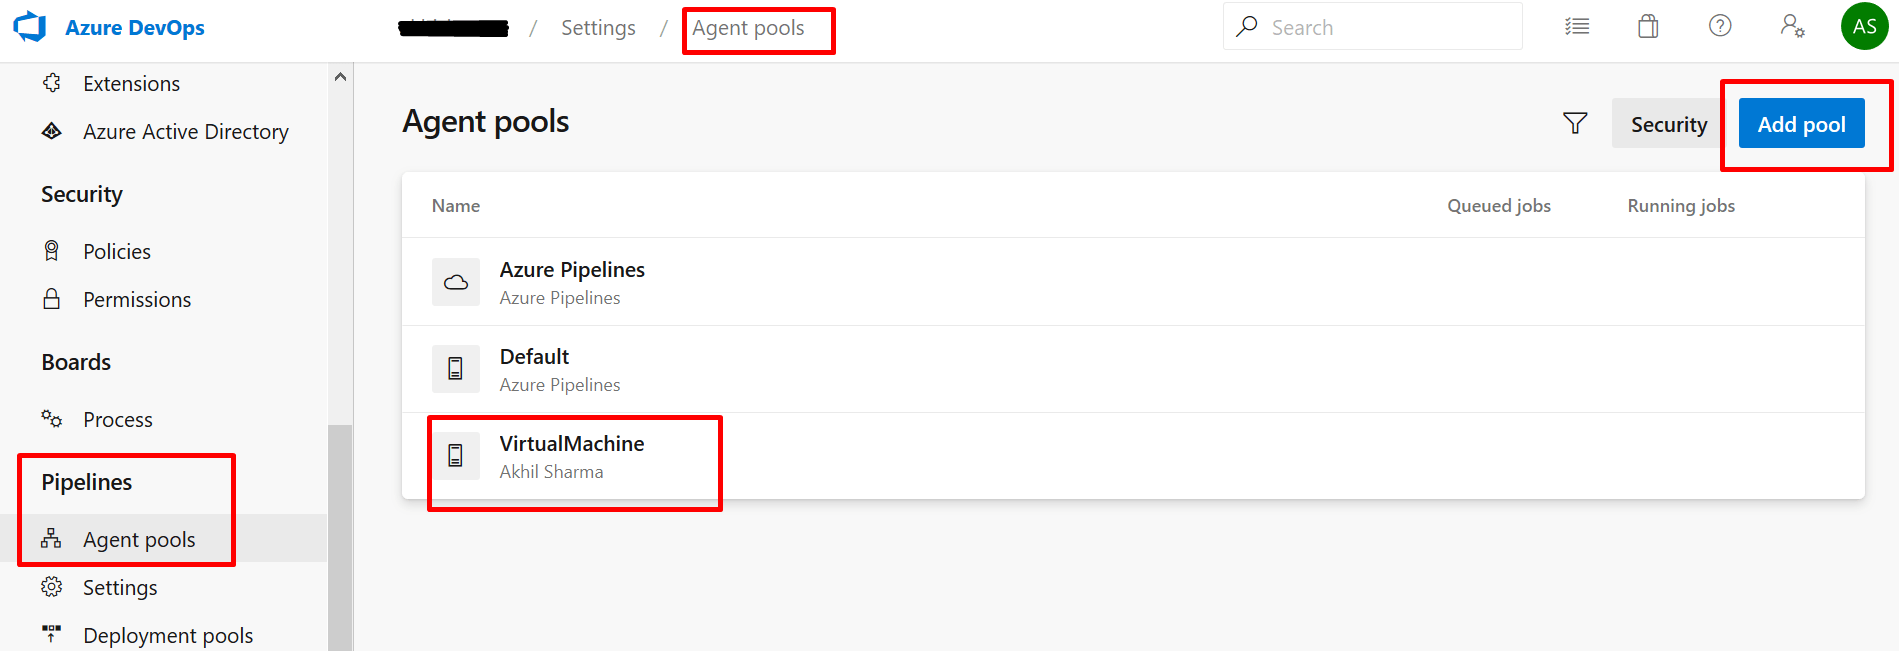
Step 3: Proceed to Organisation Settings
Step 4: Under Organisation settings, proceed to Agent Pool settings.
Step 5: Create as Agent pool of your choice, else we can use Default pool as well for configuring our agent. In my case, I’ve created an Agent pool named VirtualMachine.
Step 6: Click on your agent pool and click on New Agent to add a new agent to your agent pool.

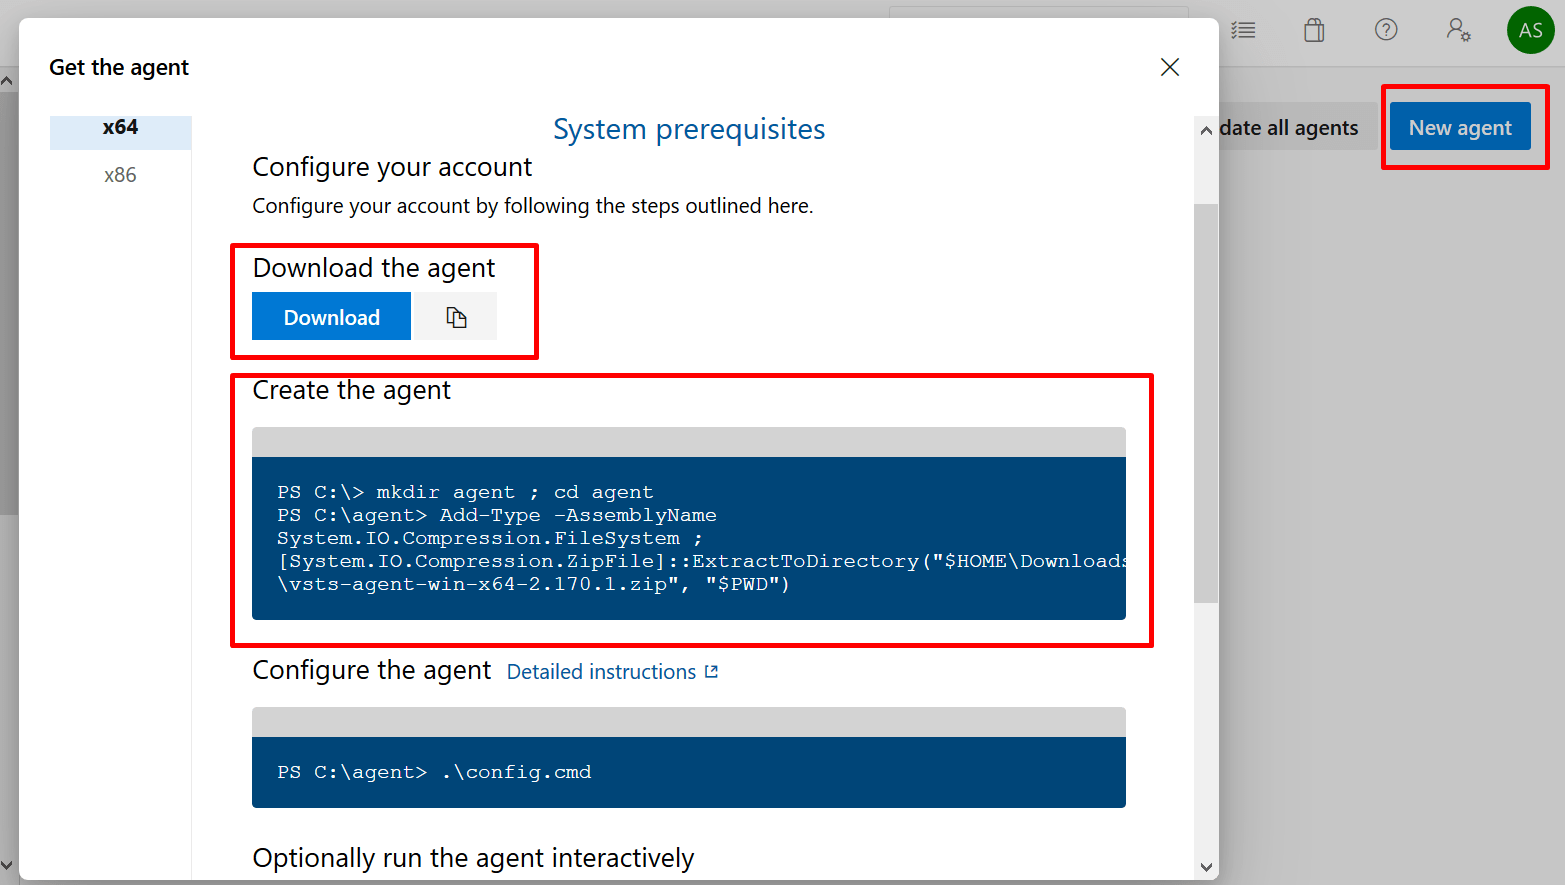
The above screen shows what all things need to be done for configuring your agent.
Step 8: Download the agent file onto your VM or machine which you want to configure as an agent with Azure DevOps.
Incase your VM does not allow you to download the file due to restrictions, download it on your system and then copy it on to your VM.
Step 9: Follow the steps as mentioned on your AzureDevOps screen to create the agent. (I have marked the section in the image earlier which you need to run.)
Step 10: Now comes the most important part which you have been waiting for. Configuring the agent behind proxy. In powershell, run the below command in the root folder of your agent.
.\config.cmd --proxyurl http://180.40.62.22:8000
The above command would launch and interactive command line agent configuration process. Provide the details such as AzureDevOps server/org, PAT, Agent Pool, etc. Once the information is completely provided, your agent should be configured successfully and should be running behind proxy.
Here, the proxy parameter to the command is very essential and does the main magic of running the agent behind proxy.
What if the connection is not getting through?
You will get the following error or something related to this:
[2020-06-11 01:42:26Z INFO VisualStudioServices] Starting operation Location.GetConnectionData
[2020-06-11 11:42:47Z WARN VisualStudioServices] Attempt 1 of GET request to https://dev.azure.com/ORGANISATION/_apis/connectionData?connectOptions=1&lastChangeId=-1&lastChangeId64=-1 failed (WinHttp Error: ERROR_WINHTTP_TIMEOUT). The operation will be retried in 11.120 seconds.
[2020-06-11 11:43:40Z WARN VisualStudioServices] Attempt 2 of GET request to https://dev.azure.com/ORGANISATION/_apis/connectionData?connectOptions=1&lastChangeId=-1&lastChangeId64=-1 failed (WinHttp Error: ERROR_WINHTTP_TIMEOUT). The operation will be retried in 13.352 seconds.
If your agent is successfully configured, you can see it’s status in your agent pool on Azure DevOps portal.

I hope this tutorial was useful.
Thank you!