
Creating Service Principal Through Azure Portal
What is Service Principal?
As per Microsoft, an Azure service principal is an identity created for use with applications, hosted services, and automated tools to access Azure resources. This access is restricted by the roles assigned to the service principal, giving you control over which resources can be accessed and at which level. For security reasons, it’s always recommended to use service principals with automated tools rather than allowing them to log in with a user identity.
Creating Service Principal
There are two ways of creating a service principal\
- Azure Portal\
- PowerShell Commands / Azure Cli
In this blog post, we shall briefly discuss the steps to create a service principal using Azure Portal.
Step 1: Login to your Azure account through Azure portal
Step 2: Select Azure Active Directory
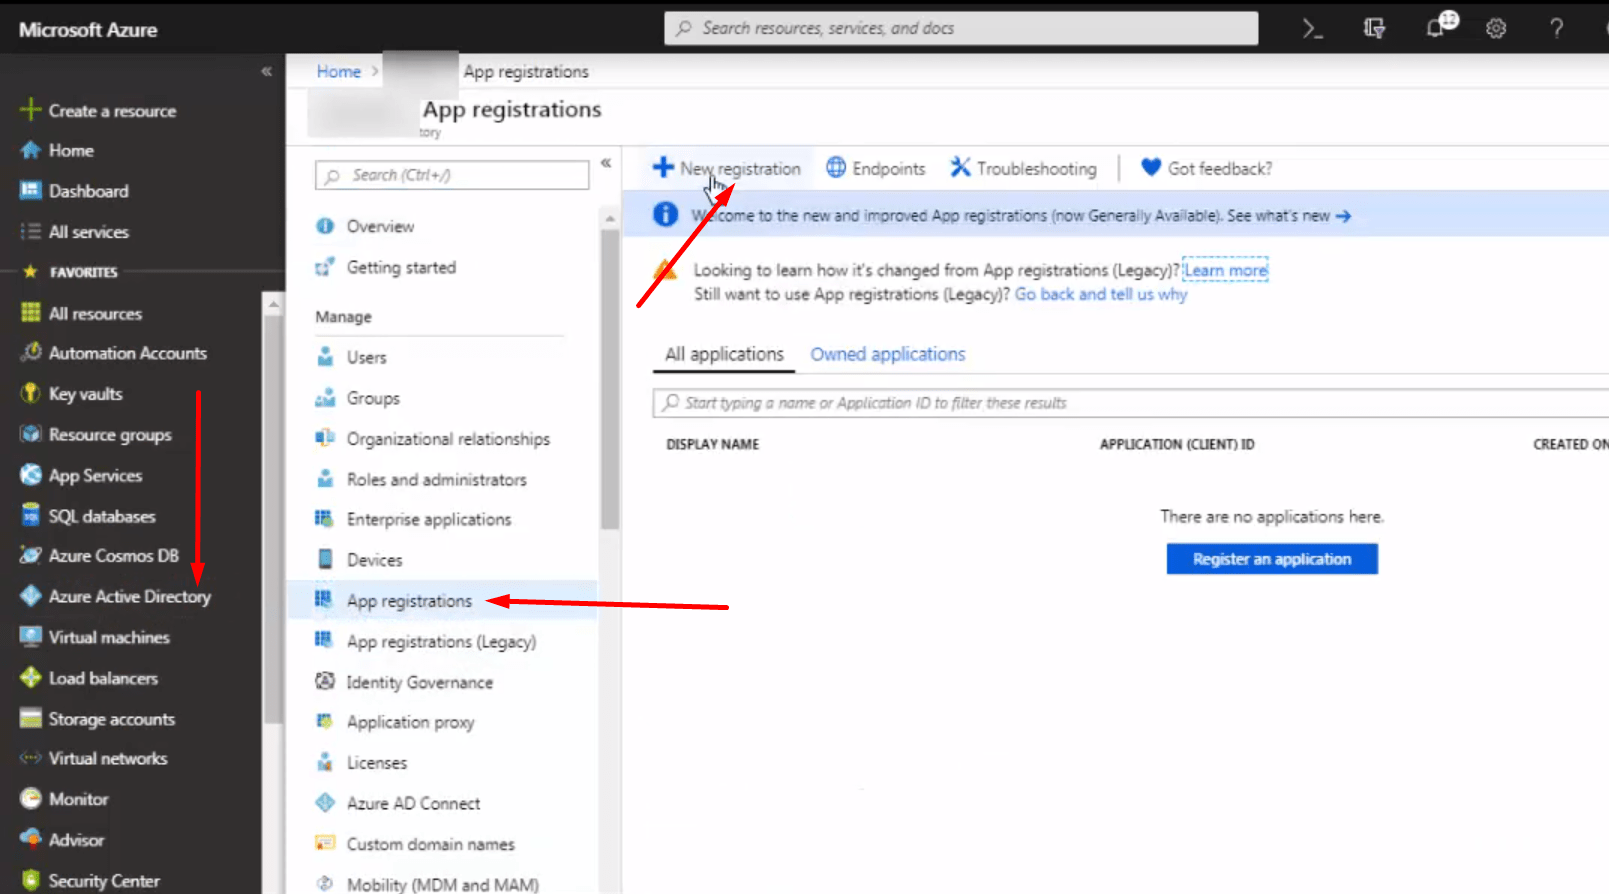
Step 3: Select App registrations
Step 4: Select New registration
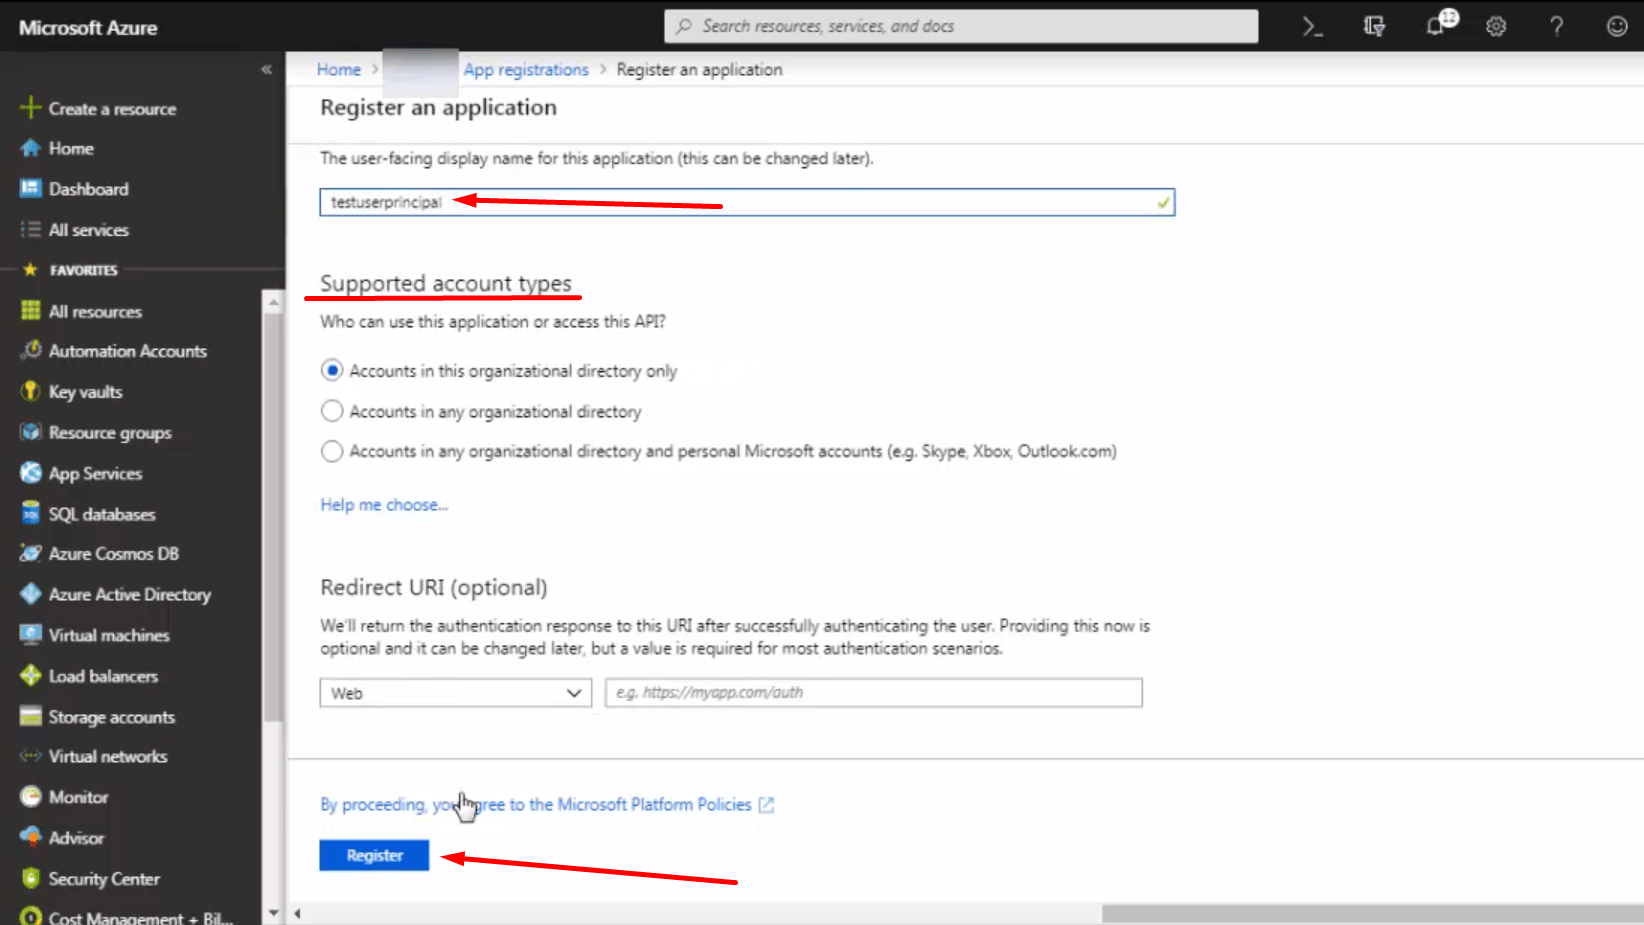
Step 5: Enter the application name and select the most appropriate supported account type from the supported types radio buttons. Enter the Redirect URI (optional step). This URI is where the access token is sent to for most authentications. It is optional to mention the URI here and it can be mentioned at a latter stage as well.
Step 6: After mentioning the details for step 5, click on Register to register the application.
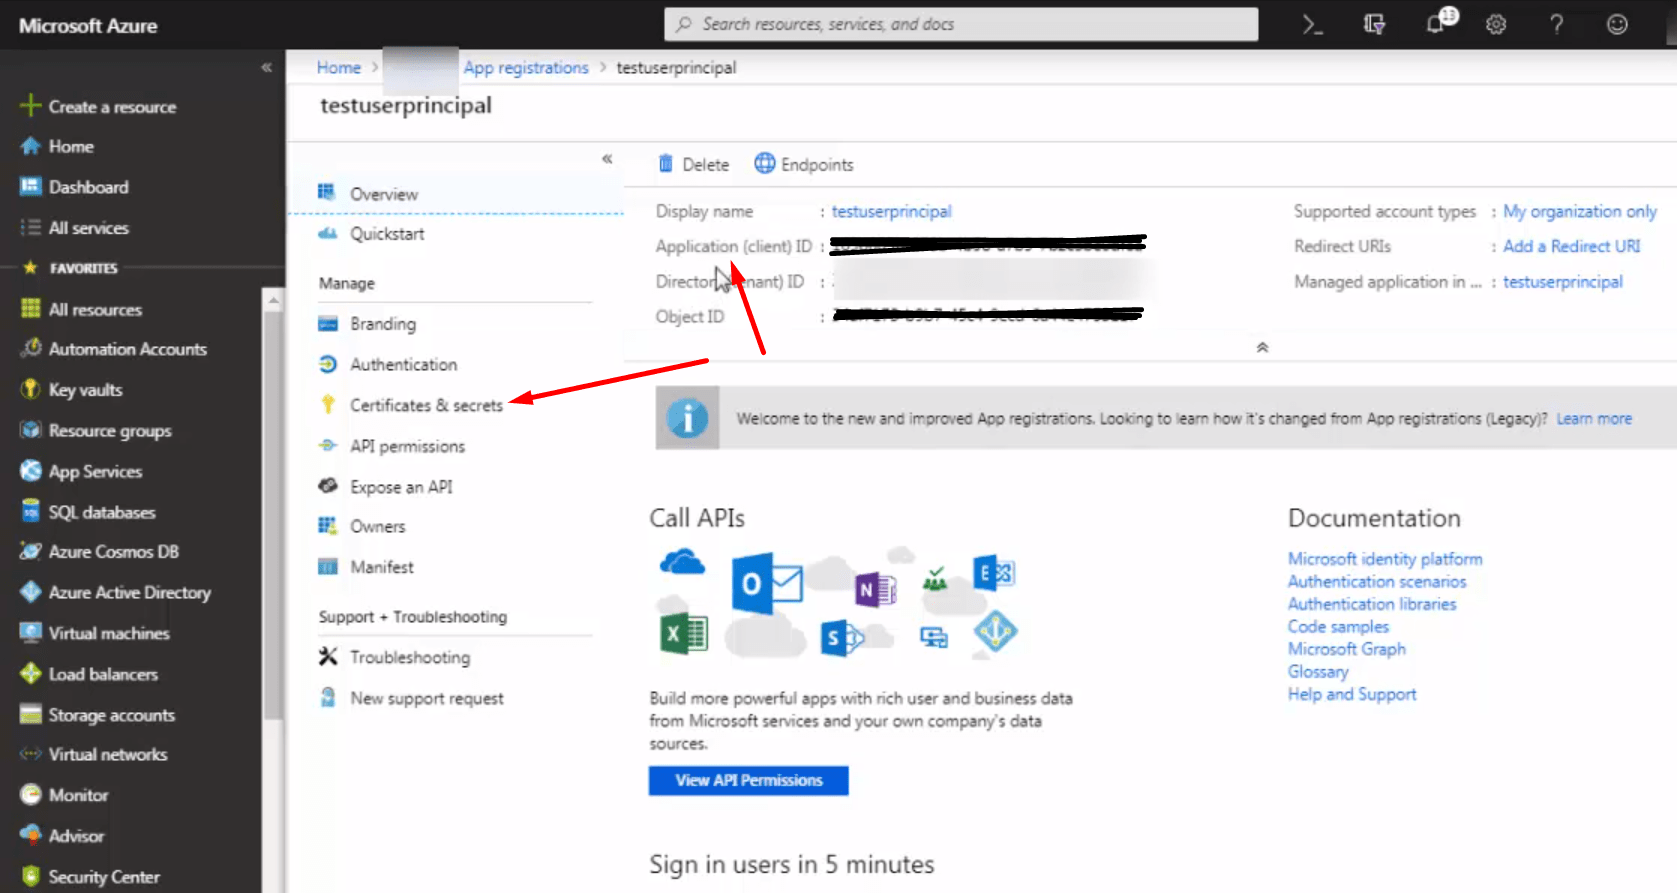
Step 7: Once the application registration is complete, you will get an application page showing the necessary details for the application. Note down the Application (Client) ID and Directory (Tenant) ID displayed on the application page. These two IDs are important parts of a service principal.
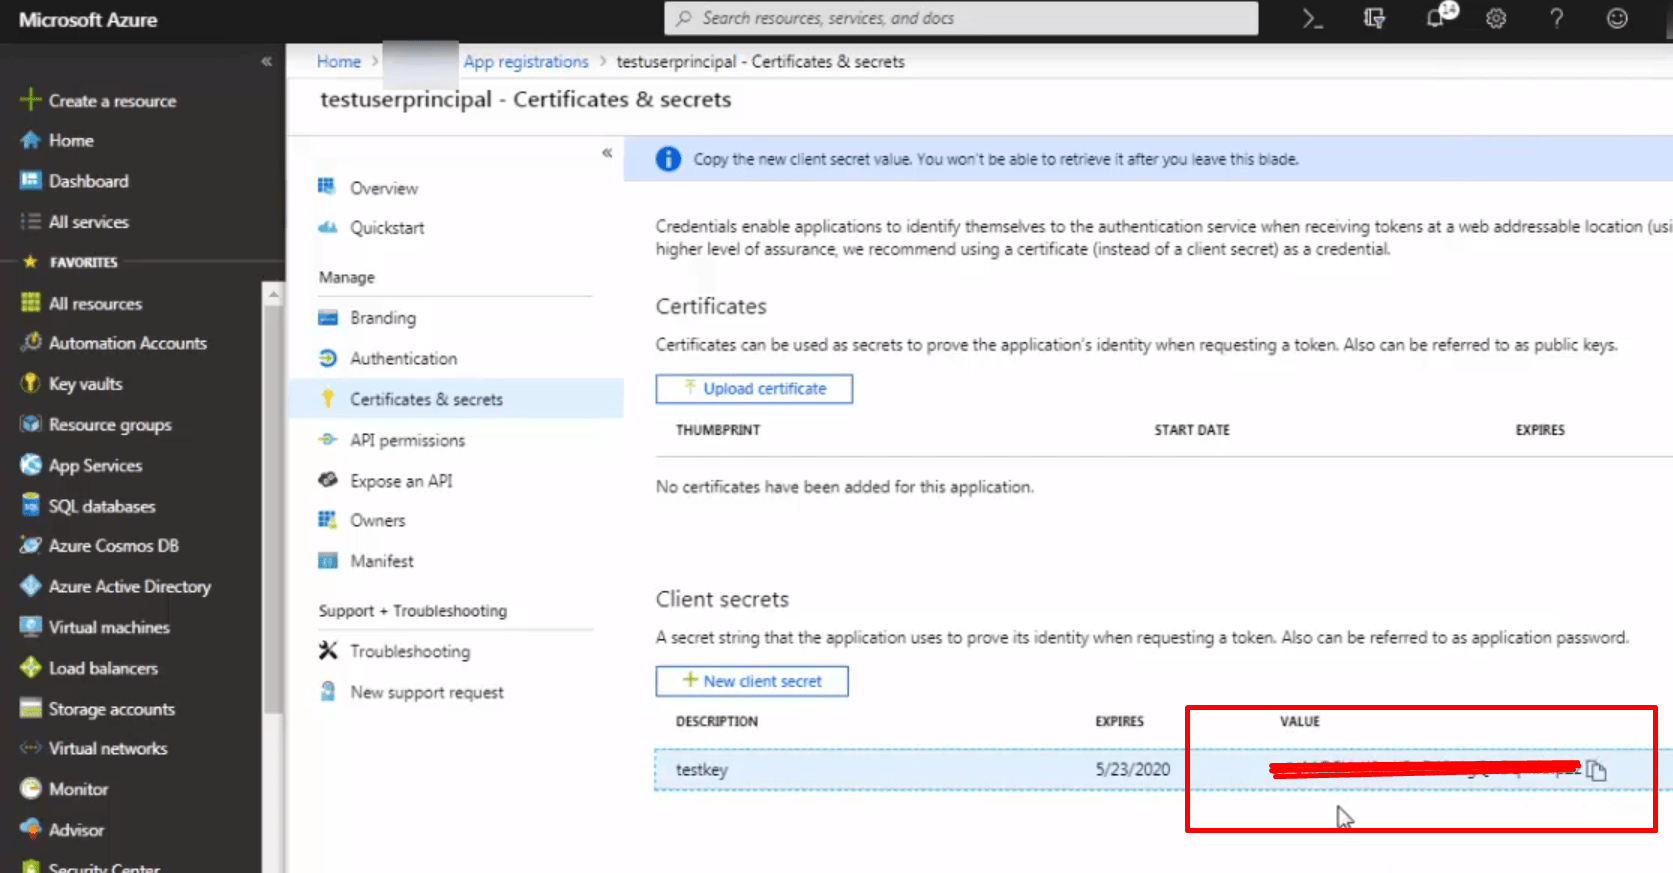
Step 8: Now, click on the Certificates & Secrets tab on the menu options displayed for Application page.
Step 9: Click on New client secret
Step 10: Mention the client secret name and expiry time for the secret in the pop up window appearing on the azure portal.
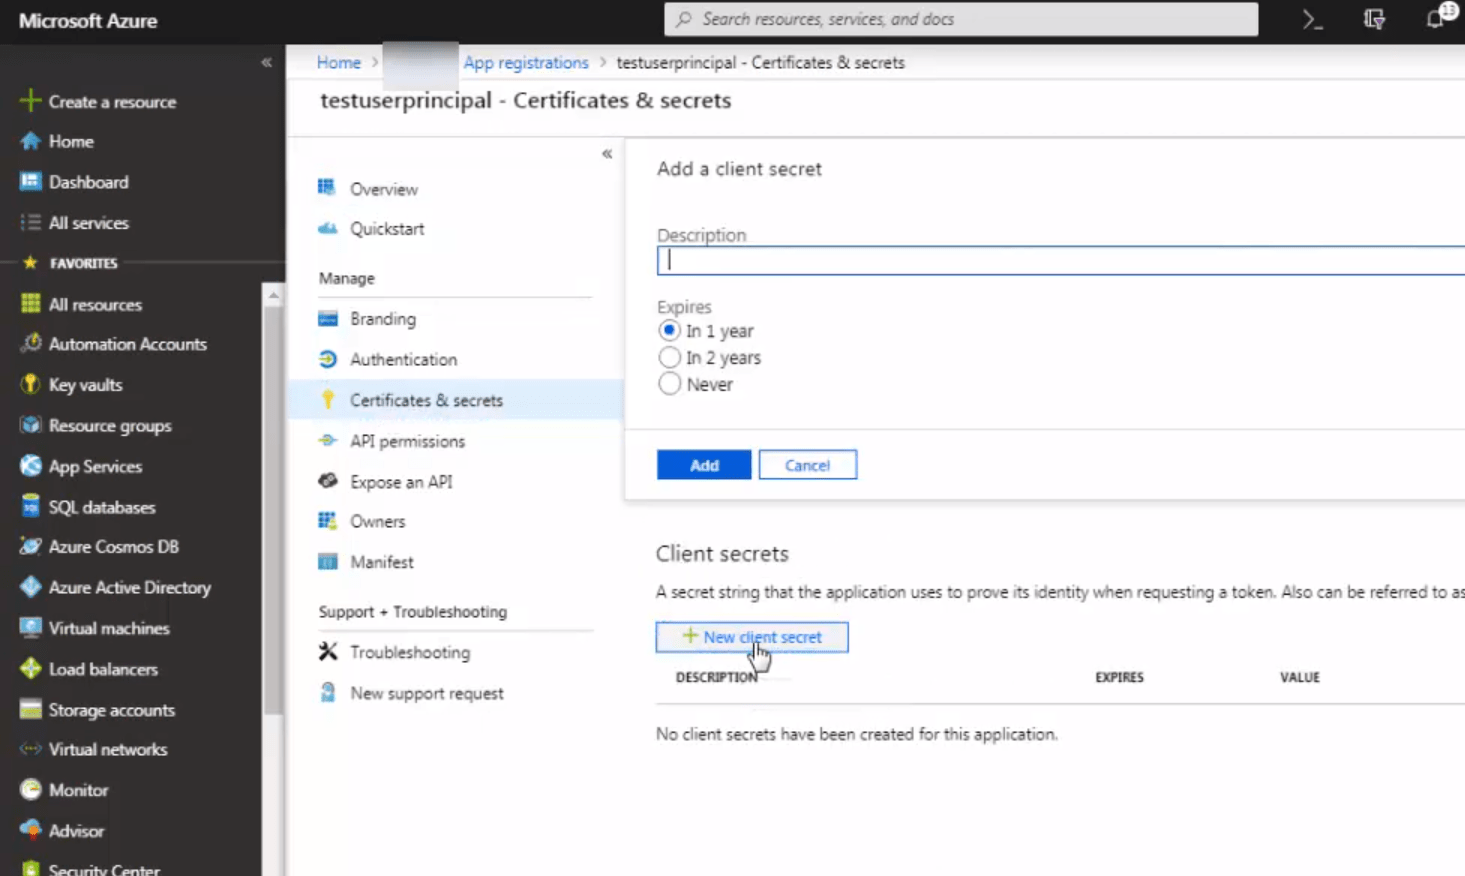
Step 11: After mentioning the client secret name and expiry time, click on Add
Step 12: Now client secret show appear in the new row created in the client secrets section.
Step 13: Note down the client secret in a secure place.
Please note: Once you move away or close this client secret pane, you will not be able to view this secret again. Hence this is the only chance for you to copy the secret and secure it in a safe place.
Step 14: Now we have 3/4 parts of service principal. The last part left here is your subscription ID which will make this service principal directly authenticate and access the service in the subscription. In order to get the subscription ID, navigate to the Subscriptions pane from the list of azure services. The subscription ID is mentioned in front of the subscription name for ease of use. Note down that subscription ID and you will have the required details for the service principal handy with you.
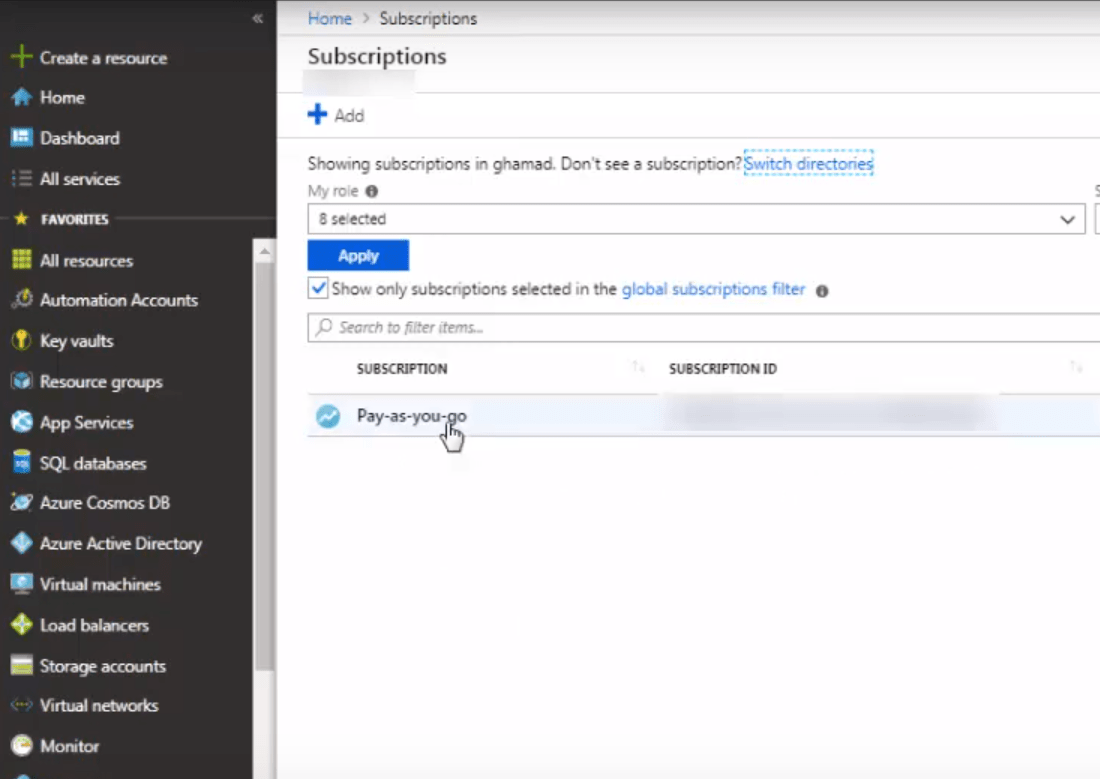
Step 15: If you think having service principal would give you access to all the resources in the subscription right away, well you are wrong here. In order to access the resources in the subscription, the service principal or the application created must have access of that subscription. Click on the subscription in the subscriptions blade to access the subscription details page.
Step 16: Click on Access Control (IAM)
Step 17: Click on Role Assignments
Step 18: Click on Add
Step 19: In the add role assignment pop up window in the azure portal, select the Role from the list of roles best suited for the purpose of service principal / application.
In most cases, it is best and sufficient to give Contributor access to service principal / application.
Step 20: After selecting the role, in the Select text box, enter the name of application you registered in AAD in Step 5. (Service Principal / application) You should see the name of the application shown in the user/applications list below. Select the application and click on add.
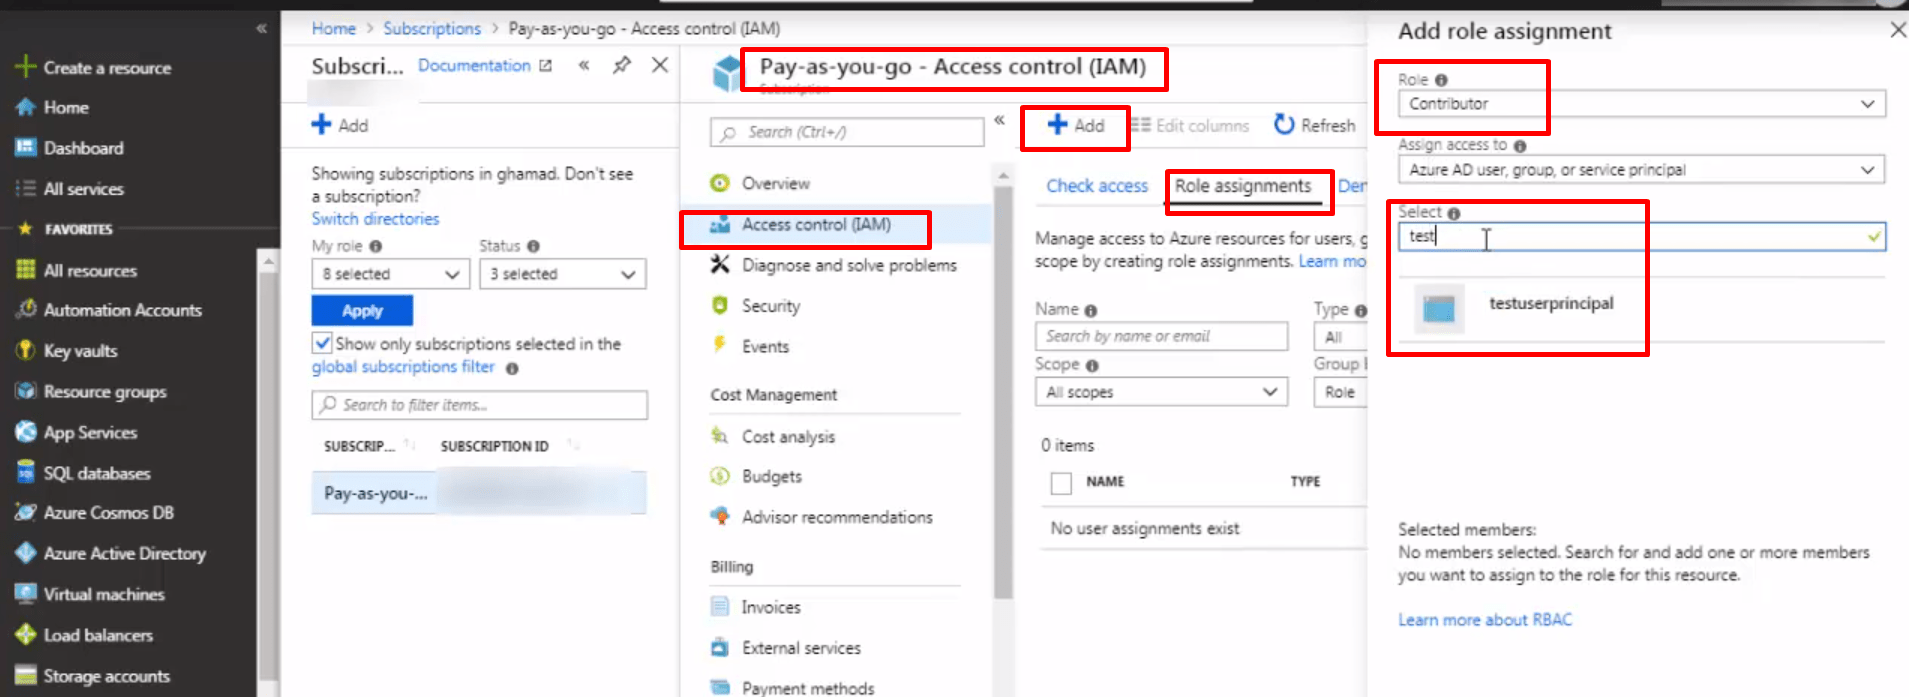
Step 21: After clicking on the Add button, you should see the service principal / application name showing the assignments page with the type App and the role as per you selected in step 19.
If you see the application name showing in the assignments, you are done!! You can now access all the resources in the subscription using this service principal.
References and more stuff