
Setting Approvals Through Azure Pipelines Environment
In this post, we’ll be discussing the steps to configure manual approvals for your Yaml based pipeline through Azure Pipeline Environments. Before your proceed further, I would strongly suggest you to go through my old blog post explaining deployment through Yaml based Pipelines where we used environments.
As per official documentation from Microsoft’s site,
“An environment is a collection of resources that can be targeted by deployments from a pipeline. Environments can include Kubernetes clusters, Azure web apps, virtual machines, databases. Typical examples of environment names are Dev, Test, QA, Staging, and Production.“
And if I have to simplify it, I would describe environment as a collection of resources that can be used as deployment targets in your release pipeline. Now when you deploy on those targets, you can set approvals and restrictions so that you can control what goes to those environment and whatever that goes to those environments is authorized and checked.
In order to understand about applying approvals/permissions on environments, you first need to create an environment first. You can call this as a prerequisite.
In the next steps, I’ll be creating an environment and then would apply approvals to that environment.

Step 1: Headover to the Environments under Pipelines section in AzureDevOps
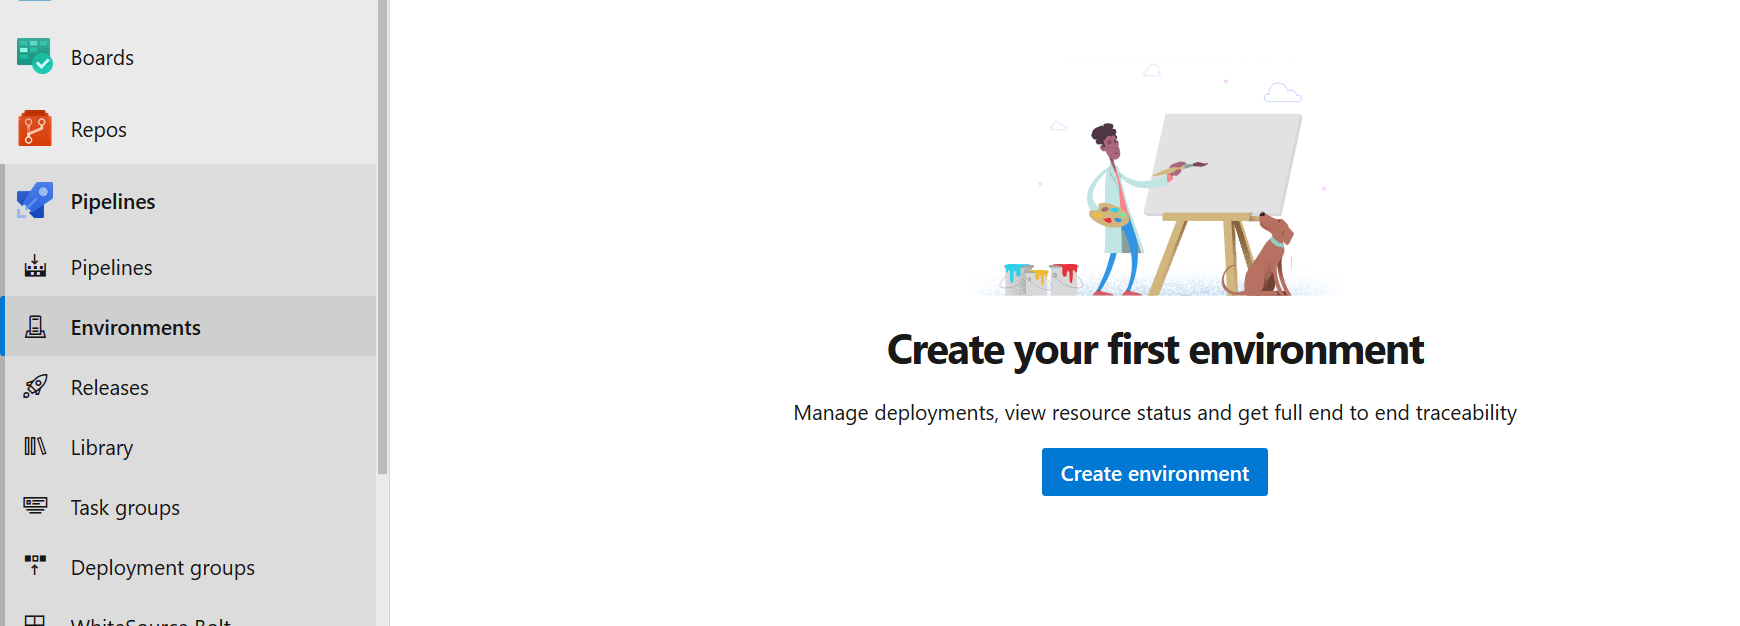
Step 2: Click on Create a new environment and name your new environment .
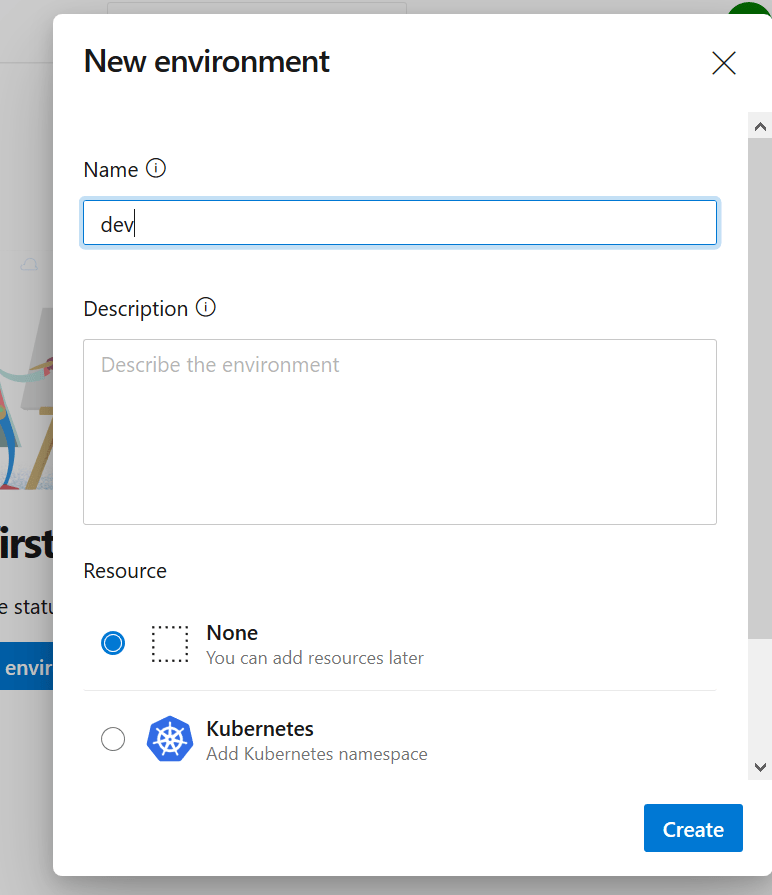
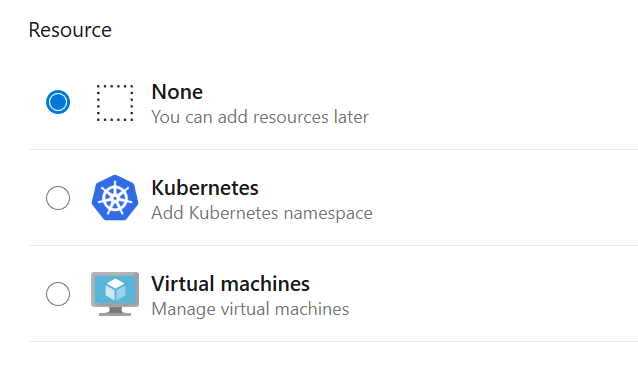
While creating an environment, you have an option to add K8s namespace or virtual machines to your environment. In this case, we won’t be adding anything and would go with defaults.
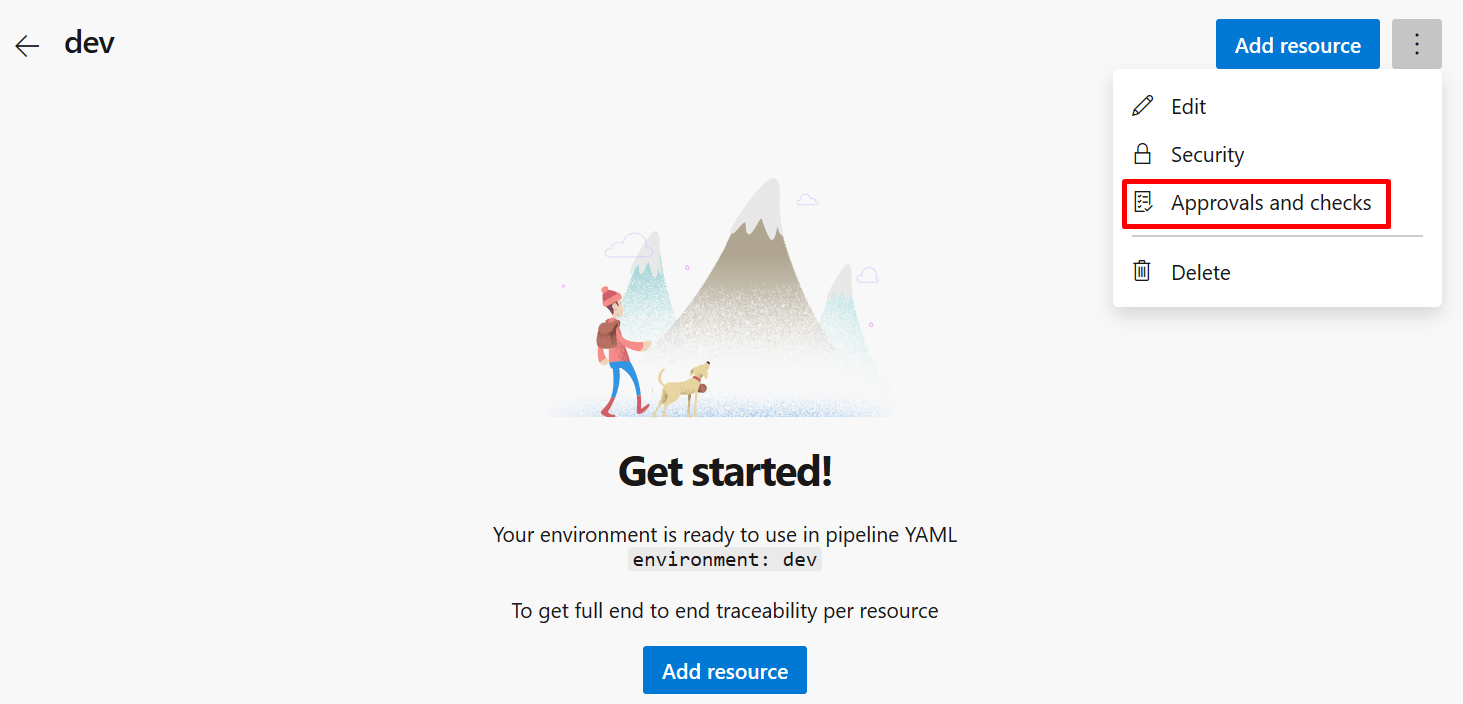
Step 3: Once the environment is created, headover to the environment options from the three dot button on left side and click on Approvals and checks.
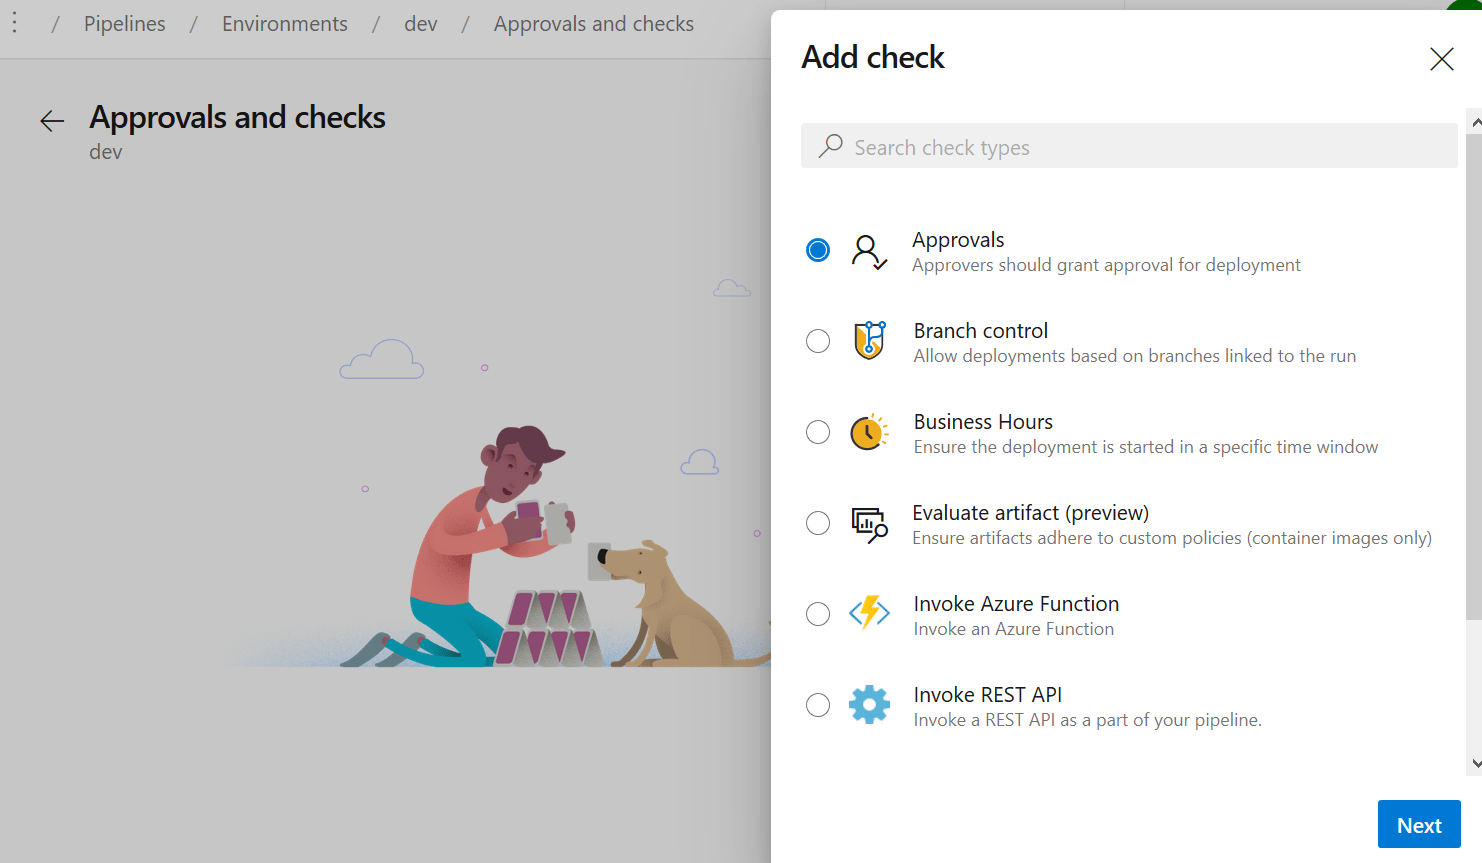
Step 4: Now click on Add Checks and select Approvals. There are multiple types of checks you can apply to your environment, but in our case lets just go for approvals.
Step 5: Select or mention the approvers for your environment. Additionally, you may set approval timeout and approval settings from the same menu. Once done, click on create.
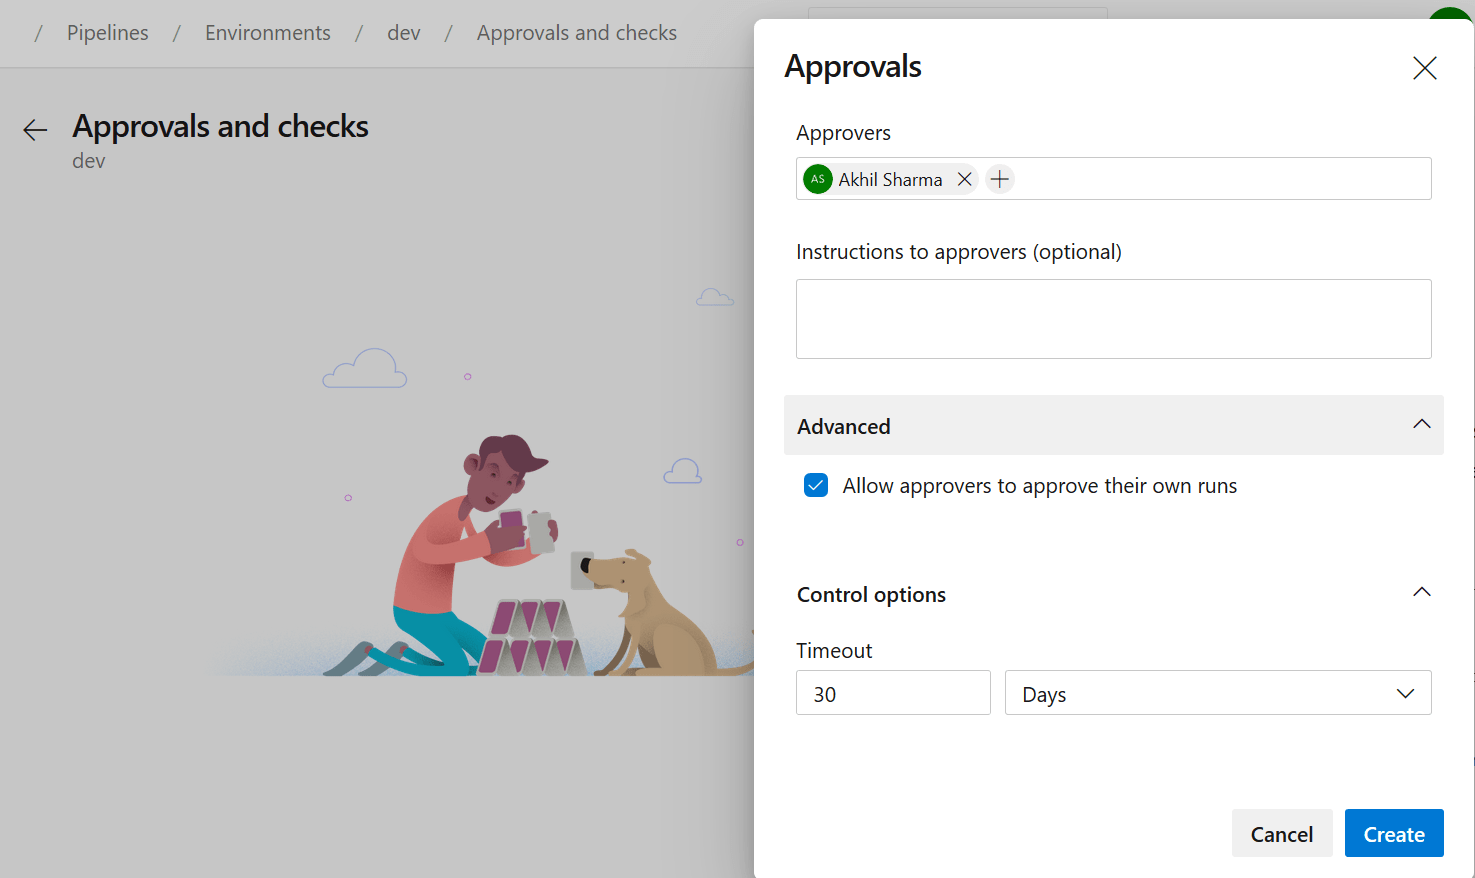
Once your approval is configured, it should look something like this.

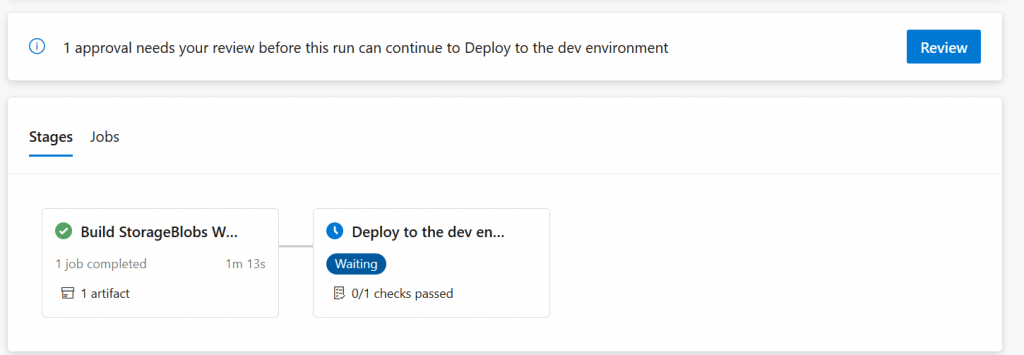
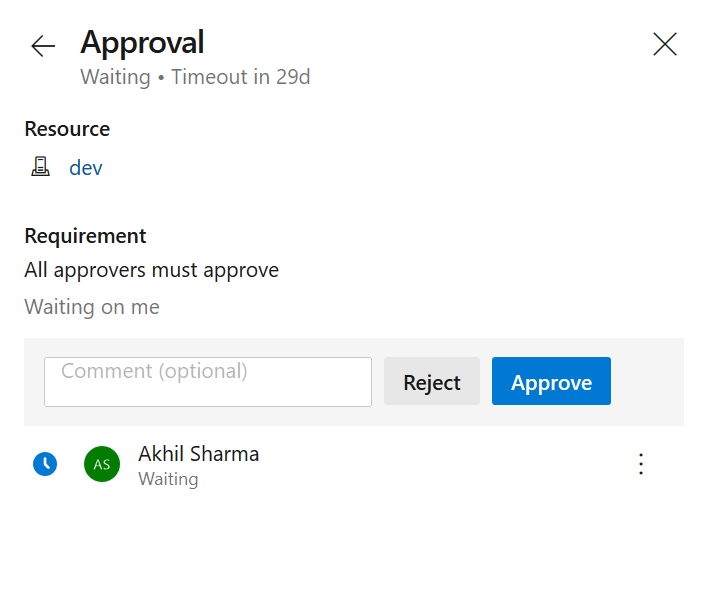
If you have configured your approvals correctly and then you can use that environment in your azure pipeline, it should ask you for approvals where it is mentioned.
I applied it in an application deployment and was prompted for approvals as follows:
I hope this blog post gave an idea of how to apply approvals for your environment. I hope my effort helped you!
Thank you!